Friday, February 12, 2016

How to Backup Facebook Account


While browsing on internet recently i came to know, we can take Facebook full account backup and we can download in our PC. Now a days every social media platform has an option to take back up our account.

Steps to Get Facebook Back Up:

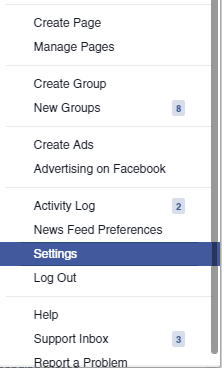
Step 1: Click on your Facebook Account Settings.

1 FB Settings_ Digital Marktting Missile.jpg

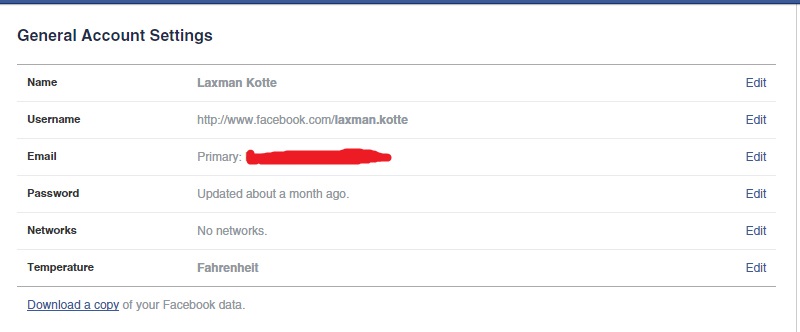
Step 2: Click on Download a Copy

2 Download Copy _Digital Marktting Missile.jpg


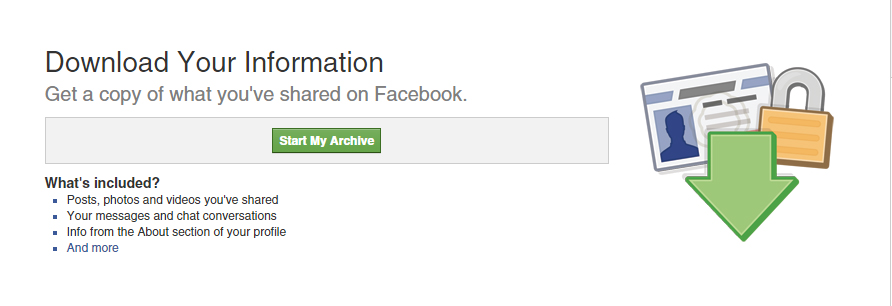
Step 3: Click on Start My Archive

3 Download Information_Digital Marktting Missile.jpg

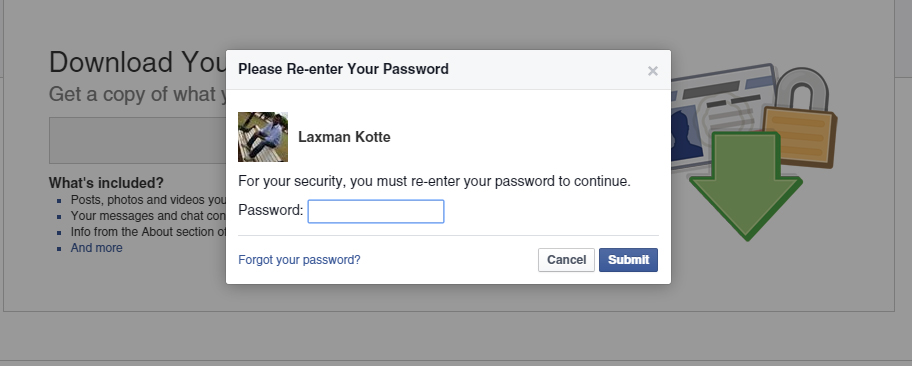
Step 4: Please Re-enter the password of your account

4 Re Enter the Password_Digital Marktting Missile.jpg

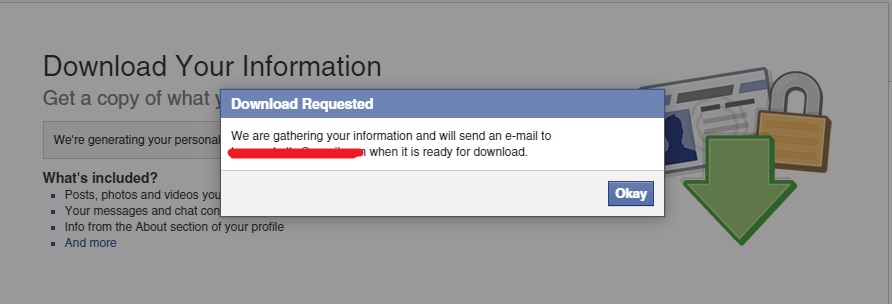
Step 5: The download request will send to your registered Facebook email ID

5 Download Request_Digital Marktting Missile.jpg

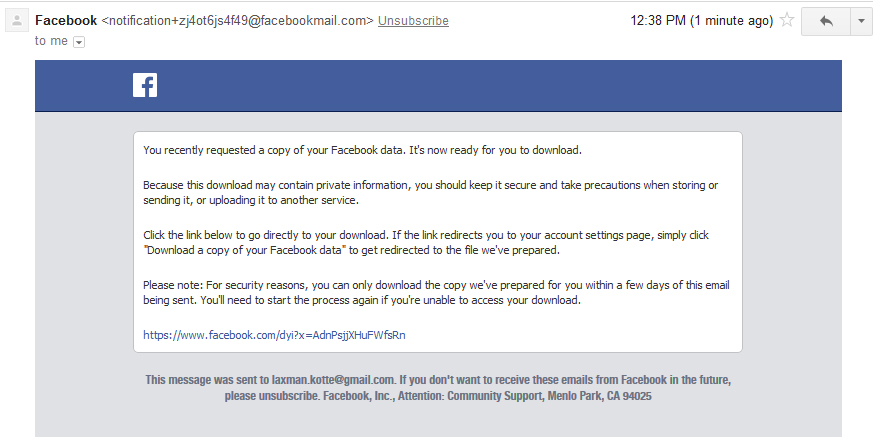
Step 6: Once you receive email from the Facebook, just click on the link to download

6 Facebook Backup Email_Digital Marktting Missile.jpg


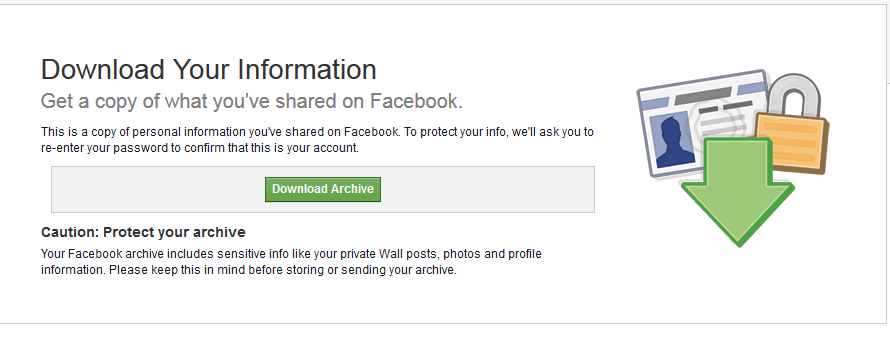
Step 7: Now you can download your backup Facebook Profile.

7 Download Information_Digital Marktting Missile.jpg


Here is the list of things we can get from the backup file,


  • About Me: Information you added to the About section of your Timeline like relationships, work, education, where you live and more. It includes any updates or changes you made in the past and what is currently in the About section of your Timeline.

  • Account Status History: The dates when your account was reactivated, deactivated, disabled or deleted.

  • Active Sessions: All stored active sessions, including date, time, device, IP address, machine cookie and browser information.

  • Ads Clicked: Dates, times and titles of ads clicked (limited retention period).

  • Address: Your current address or any past addresses you had on your account.

  • Ad Topics: A list of topics that you may be targeted against based on your stated likes, interests and other data you put in your Timeline.

  • Alternate Name: Any alternate names you have on your account (ex: a maiden name or a nickname).

  • Apps: All of the apps you have added.

  • Birthday Visibility: How your birthday appears on your Timeline.

  • Chat: A history of the conversations you’ve had on Facebook Chat (a complete history is available directly from your messages inbox).

  • Check-ins: The places you’ve checked into.

  • Connections: The people who have liked your Page or Place, RSVPed to your event, installed your app or checked in to your advertised place within 24 hours of viewing or clicking on an ad or Sponsored Story.

  • Credit Cards: If you make purchases on Facebook (ex: in apps) and have given Facebook your credit card number.

  • Currency: Your preferred currency on Facebook. If you use Facebook Payments, this will be used to display prices and charge your credit cards.

  • Current City: The city you added to the About section of your Timeline.

  • Date of Birth: The date you added to Birthday in the About section of your Timeline.

  • Deleted Friends: People you’ve removed as friends.

  • Education: Any information you added to Education field in the About section of your Timeline.

  • Emails: Email addresses added to your account (even those you may have removed).

  • Events: Events you’ve joined or been invited to.

  • Facial Recognition Data: A unique number based on a comparison of the photos you're tagged in. We use this data to help others tag you in photos.

  • Family: Friends you’ve indicated are family members.

  • Favorite Quotes: Information you’ve added to the Favorite Quotes section of the About section of your Timeline.

  • Followers: A list of people who follow you.

  • Following: A list of people you follow.

  • Friend Requests: Pending sent and received friend requests.

  • Friends: A list of your friends.

  • Gender: The gender you added to the About section of your Timeline.

  • Groups: A list of groups you belong to on Facebook.

  • Hidden from News Feed: Any friends, apps or pages you’ve hidden from your News Feed.

  • Hometown: The place you added to hometown in the About section of your Timeline.

  • IP Addresses: A list of IP addresses where you’ve logged into your Facebook account (won’t include all historical IP addresses as they are deleted according to a retention schedule).

  • Last Location: The last location associated with an update.

  • Likes on Others' Posts: Posts, photos or other content you’ve liked.

  • Likes on Your Posts from others: Likes on your own posts, photos or other content.

  • Likes on Other Sites: Likes you’ve made on sites off of Facebook.

  • Linked Accounts: A list of the accounts you've linked to your Facebook account

  • Locale: The language you've selected to use Facebook in.

  • Logins: IP address, date and time associated with logins to your Facebook account.

  • Logouts: IP address, date and time associated with logouts from your Facebook account.

  • Messages: Messages you’ve sent and received on Facebook. Note, if you've deleted a message it won't be included in your download as it has been deleted from your account.

  • Name: The name on your Facebook account.

  • Name Changes: Any changes you’ve made to the original name you used when you signed up for Facebook.

  • Networks: Networks (affiliations with schools or workplaces) that you belong to on Facebook.

  • Notes: Any notes you’ve written and published to your account.

  • Notification Settings: A list of all your notification preferences and whether you have email and text enabled or disabled for each.

  • Pages You Admin: A list of pages you admin.

  • Pending Friend Requests: Pending sent and received friend requests.

  • Phone Numbers: Mobile phone numbers you’ve added to your account, including verified mobile numbers you've added for security purposes.

  • Photos: Photos you’ve uploaded to your account.

  • Pokes: A list of who’s poked you and who you’ve poked. Poke content from our mobile poke app is not included because it's only available for a brief period of time. After the recipient has viewed the content it's permanently deleted from our systems.

  • Posts by You: Anything you posted to your own Timeline, like photos, videos and status updates.

  • Posts by Others: Anything posted to your Timeline by someone else, like wall posts or links shared on your Timeline by friends.

  • Posts to Others: Anything you posted to someone else’s Timeline, like photos, videos and status updates.

  • Privacy Settings: Your privacy settings.

  • Recent Activities: Actions you’ve taken and interactions you’ve recently had.

  • Registration Date: The date you joined Facebook.

  • Removed Friends: People you’ve removed as friends.

  • Searches: Searches you’ve made on Facebook.

  • Shares: Content (ex: a news article) you've shared with others on Facebook using the Share button or link.

  • Status Updates: Any status updates you’ve posted.

  • Work: Any current information you’ve added to Work in the About section of your Timeline.

  • Vanity URL: Your Facebook URL (ex: username or vanity for your account).

  • Videos: Videos you’ve posted to your Timeline.

Thursday, February 11, 2016

SEO HTTP Response Codes List


First will know the abbreviation of HTTP, HTTP stands for Hypertext Transfer Protocol. These HTTP codes are in 3 digit numeric number. Generally, HTTP is a TCP/IP based communication protocol, it is used to deliver the HTML, Images and Query Result files etc. on the World Wide Web.

These HTTP Response Codes are communicate between you and servers on the internet, i.e browsers sends a request to a server for the information. These requests might be images, videos, files and etc, this is called HTTP request. When a server receives that request, it sends back an HTTP Response, with information for the You/Browsers.

http_status_code.jpg

Here are the common HTTP Response Codes are,
2xx: Success It means the action was successfully received, understood, and accepted.

3xx: Redirection It means further action must be taken in order to complete the request.

4xx: Client Error It means the request contains incorrect syntax or cannot be fulfilled.

5xx: Server Error It means the server failed to fulfill an apparently valid request.

seos-guide-to-http-status-codes.gif


HTTP Status Codes for SEO and Search Engines
200 OK
The request has succeeded. This is considered correct for most scenarios.

301 Moved Permanently
The requested resource has been assigned a new permanent URI and any future references to this resource should use one of the returned URIs. The 301 redirect, as it is commonly called by SEOs, should be utilized any time one URL needs to be redirected to another.

302 Found
A status code of 302 tells a client that the resource they asked for has temporarily moved to a new location. The response should also include this location. It tells the client that it should carry on using the same URL to access this resource.

403 - Forbidden
A 403 status code indicates that the client cannot access the requested resource. That might mean that the wrong username and password were sent in the request, or that the permissions on the server do not allow what was being asked.

404 File Not Found
The best known of them all, the 404 status code indicates that the requested resource was not found at the URL given, and the server has no idea how long for.

410 - Gone
A 410 status code is the 404's lesser known cousin. It indicates that a resource has permanently gone (a 404 status code gives no indication if a resource has gine permanently or temporarily), and no new address is known for it.

500 Server Error
Server Error: Valid request was made by the client, but the server failed to complete the request.

503 - Service Unavailable
A 503 status code is most often seen on extremely busy servers, and it indicates that the server was unable to complete the request due to a server overload.


External Sources:
http://www.tutorialspoint.com/http/http_status_codes.htm

Tuesday, January 5, 2016

Importance Facebook OG Meta Tags and Twitter OG Meta Tags


Firstly, we need to understand Social Media Tags ( OG ) will not influence the Search Engine Ranking but it will indirectly effect on increase the traffic. For website page we generally optimize with meta tags for Google rankings and click-through rates, the same for Facebook and Twitter.

In Facebook or other social networking sites, if we want to show proper image of the Article, Title of the Article and the Some Description of the Article we should use these tags, it will drive traffic to our websites. There are Facebook Open Graph and Twitter Cards
Here is the Facebook Basic OG Tags,

<meta property=”og:title” content=”The title of your article without any branding such as your site name.” />
<meta property=”og:type” content=”article” />
<meta property=”og:description” content=”A brief description of the content, usually between 2 and 4 sentences. This will displayed below the title of the post on Facebook. “ />
<meta property=”og:image” content=”The URL of the image that appears when someone shares the content to Facebook.” />
<meta property=”og:url” content=”The canonical URL for your page.” />
<meta property=”og:site_name” content=”The name of your website”/>
<meta property=”fb:admins” content=”500013011 /> If we want to get more data in Facebook Insights, then we have to use this tag. It tells Facebook you are the site owner, and it connects your Facebook fan page to your website.
<meta property="fb:app_id" content="your_app_id" />


Facebook Video OG Meta Tags, these facebook video og meta tags will definitely help you maximum optimization for your website videos on Facebook with the help of few properties. Here is the facebook video og meta tags,
<meta property=”og:video” content=” The URL for the video. If you want the video to play in-line in News Feed, you should use the https:// URL if possible.”/>
<meta property=”og:video:url” content=” Equivalent to og:video”/>
<meta property=”og:video:secure_url”content=” Secure URL for the video. Include this even if you set the secure URL in og:video.”/>
<meta property=”og:video:type”content=” MIME type of the video. Either application/x-shockwave-flash or video/mp4.”/>
<meta property=” og:video:width” content=” Width of video in pixels. This property is required for videos.”/>
<meta property=” og:video:height” content Height of video in pixels. This property is required for videos.”/>
<meta property=” og:image” Specify an image for a high quality preview in News Feed”/>


Facebook Image OG Meta Tags, use these set of image og tags properties when more than one image on the page.
<meta property=” og:image” URL for the image. To update an image after it's been published, use a new URL for the new image. Images are cached based on the URL and won't be updated unless the URL changes.”/>
<meta property=” og:image:url” Equivalent to og:image”/>
<meta property=” og:image:secure_url” https:// URL for the image”/>
<meta property=” og:image:type” MIME type of the image. One of image/jpeg, image/gif or image/png”/>
<meta property=” og:image:width” Width of image in pixels. Specify height and width for your image to ensure that the image loads properly the first time it's shared.”/>
 <meta property=” og:image:height” Height of image in pixels. Specify height and width for your image to ensure that the image loads properly the first time it's shared.”/>


Facebook URL Debugger:  Once you implement these Facebook OG tags, if you will not see the output you have to troubleshot in order to get proper information like image, title, description and etc. Here is the URL: https://developers.facebook.com/tools/debug/. Paste the URL and click on debug and again click on Fetch New Scrape Information then try to post in Facebook.


Twitter OG Meta Tags
Here is the example of twitter og meta tags,
<meta name="twitter:card" content="summary" /> (The card type, which will be one of “summary”, “summary_large_image”, “photo”, “gallery”, “product”, “app”, or “player”. )
<meta name="twitter:site" content="@nytimesbits" />
<meta name="twitter:creator" content="@nickbilton" />
<meta property="og:url" content="http://bits.blogs.nytimes.com/2011/12/08/a-twitter-for-my-sister/" />
<meta property="og:title" content="A Twitter for My Sister" />
<meta property="og:description" content="In the early days, Twitter grew so quickly that it was almost impossible to add new features because engineers spent their time trying to keep the rocket ship from stalling." />
<meta property="og:image" content="http://graphics8.nytimes.com/images/2011/12/08/technology/bits-newtwitter/bits-newtwitter-tmagArticle.jpg" />

Tuesday, December 15, 2015

How to Block Visitor from Specific Countries

If you are a website owner you don’t want to access you are website all the visitors from certain countries due to different factors like, your website targeting audience are different from your actual visitors of your website, if your website targeting one specific language audience at time you no need to those those who doesn’t understand the language of the website and last one is to minimize the you are website bandwidth.

Here is the solution for blocking visitors from specific countries, IP2Location

Step 1: In the first step you have to select the IP versions like IPv4 or IPv6, you have to specify in the first step.

Step 2: In this step you have to specify the country you want to block  for unregistered user can generates table for 1 country at one time. Registered user can generates up to 30 countries at one time.

Step 3: Now choose the output format of the file, there are different types of formats like, .htaccess allow, .htaccess deny, CIDR, Linux iptables and etc… choose Apache .htaccess deny from the drop down menu.

Step 4: You will get to download a text file which is to be uploaded to your homepage’s directory as .htaccess.
4.png

How to Block Visitors and Hackers from Specific Countries in Wordpress

There are two reasons to block countries from visiting a website, first one most of the website are not getting audience from the targeted countries or regions and the second one is to protect website from the hackers. Here will see how to block visitors from different countries in wordpress website.


Step 1: You must need to install IQ Block Country wordpress plugin and activate the plugin. Once you activate it go to settings and click on IQ Block Country as below screenshot.


Step 2: Once you get it to the plugin on the top you can find Home, Frontend and Backend tabs, leave Home tab as it has default settings and now we are going to work on Frontend and Backend tabs only to block the countries.

Step 3: Now, click on Frontend tab first we need to understand what is frontend tab, in the frontend tab you can specify the list of countries that you want to block or don’t want to show website in the particular country visitors.

Step 4: Once you get into the frontend tab, make sure you must click on the “ Block Visitors from visiting the frontend of your website ” check box and in the below you can find the option “ Select the countries that should be blocked from visiting your frontend  ” in this box you have to mention the countries you want to block.


Step 5: Now you have to click on Backend tab, here backend means it’s starts off with all the countries list, click on the “ Block visitors from visiting the backend (administrator) of your website: ” check box as like below screenshot. Next, in the “ Select the countries that should be blocked from visiting your backend: ” box mention those countries you want to block make sure one thing Remove Your Targeting Countries then click on save changes.